1. Declare variables
Declare the variables associated with the data in your CSV file in the Custom Variables section, then define them in the Call Context section.2. Navigate to the Campaigns section
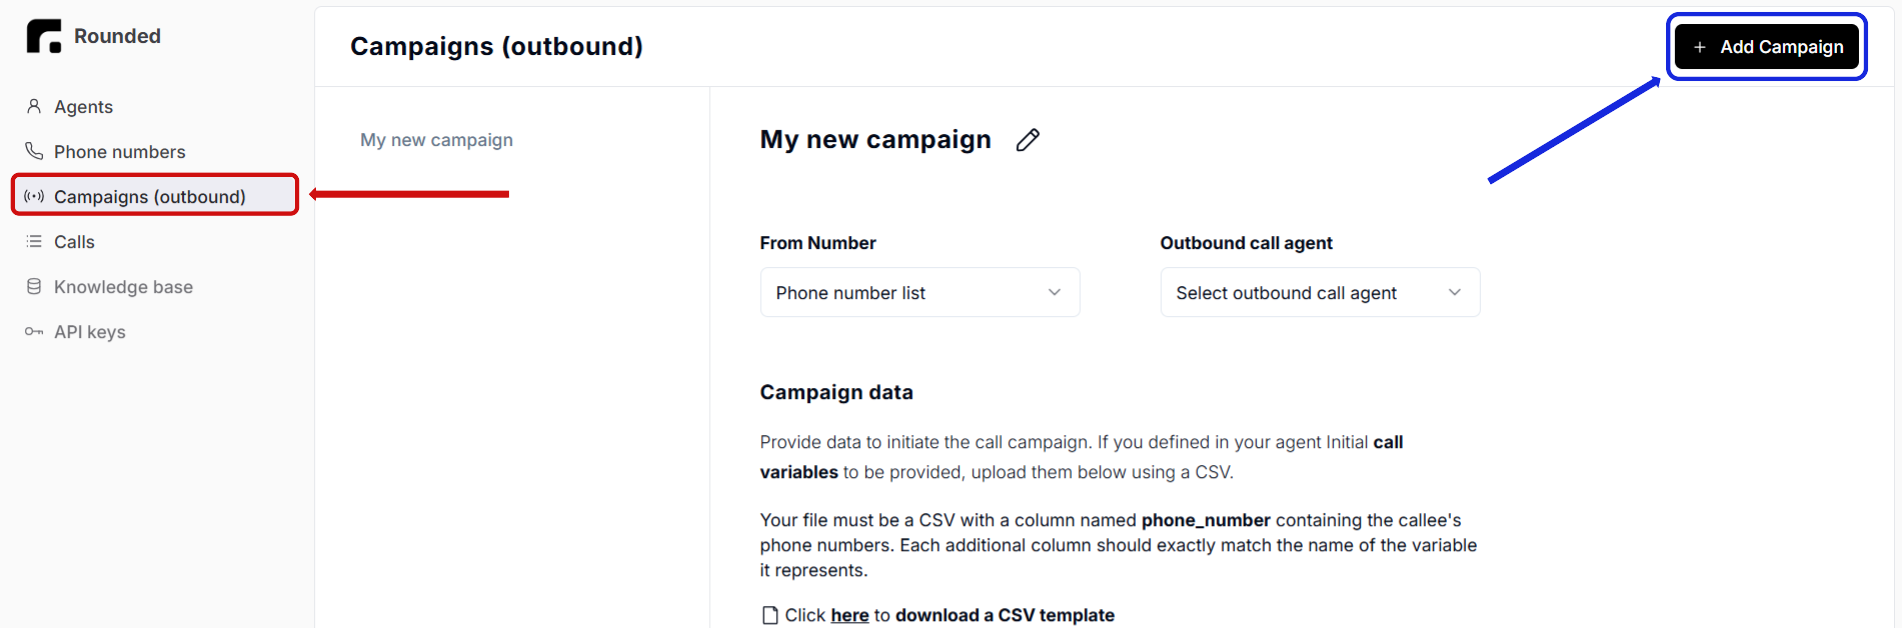
- First, go to the “Campaigns (outbound)” section (highlighted in red in the screenshot below).
- Then, click on the “Add Campaign” black button (highlighted in blue).
3. Associate a phone number and agent
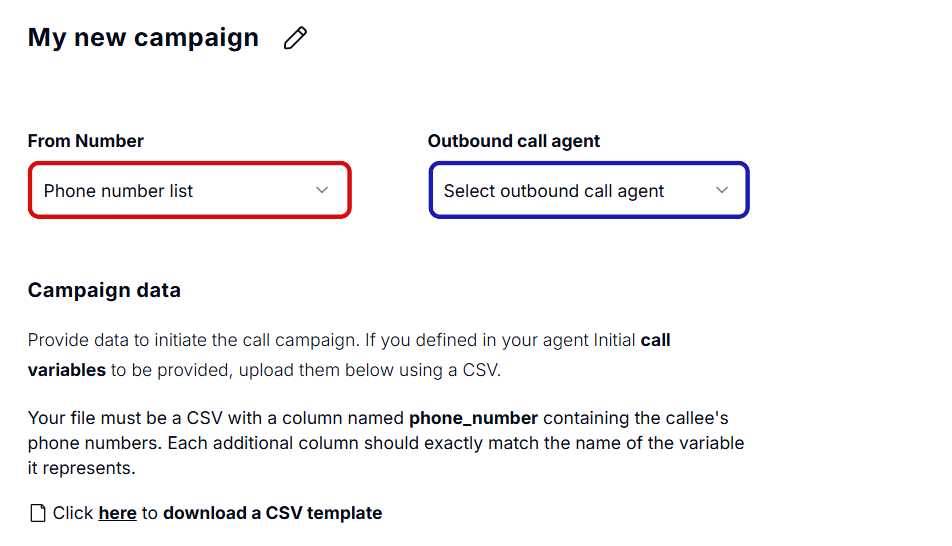
- Assign a phone number to the campaign (highlighted in red below). If you don’t have a phone number yet, refer to the Associate your agent with a phone number section.
- Link the correct agent to the campaign (highlighted in blue).
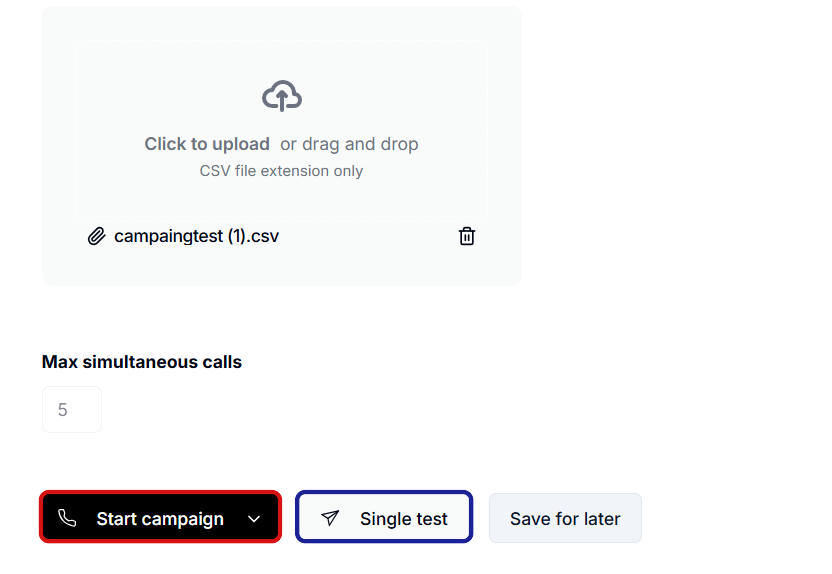
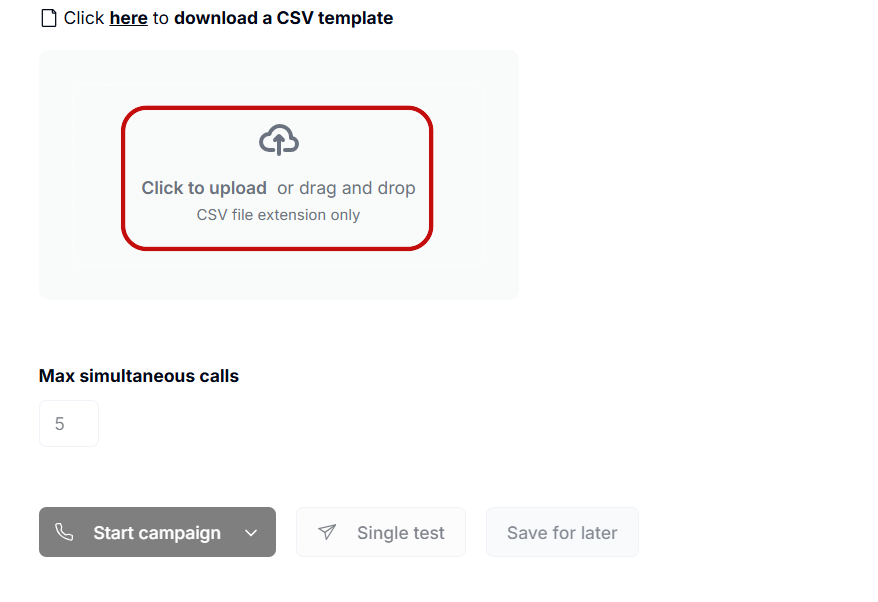
4. Upload the CSV file
Upload your CSV to the block highlighted in red below. The file must include:- A column named
phone_numberwith the numbers to call. - Columns with the exact names of the variables declared in Step 1, with appropriate values.
5. Start the campaign
To test your agent with a single number:- Click on “Single test” (highlighted in blue below).
- Fill in the variables manually.
- Click on the “Start campaign” button (highlighted in red below).