1. Access the Knowledge Bases Section
Go to the “Knowledge Bases” section, highlighted in red on the screenshot below.2. Create a Knowledge Base
Click on the black button labeled “Create a knowledge base” (highlighted in blue on the screenshot).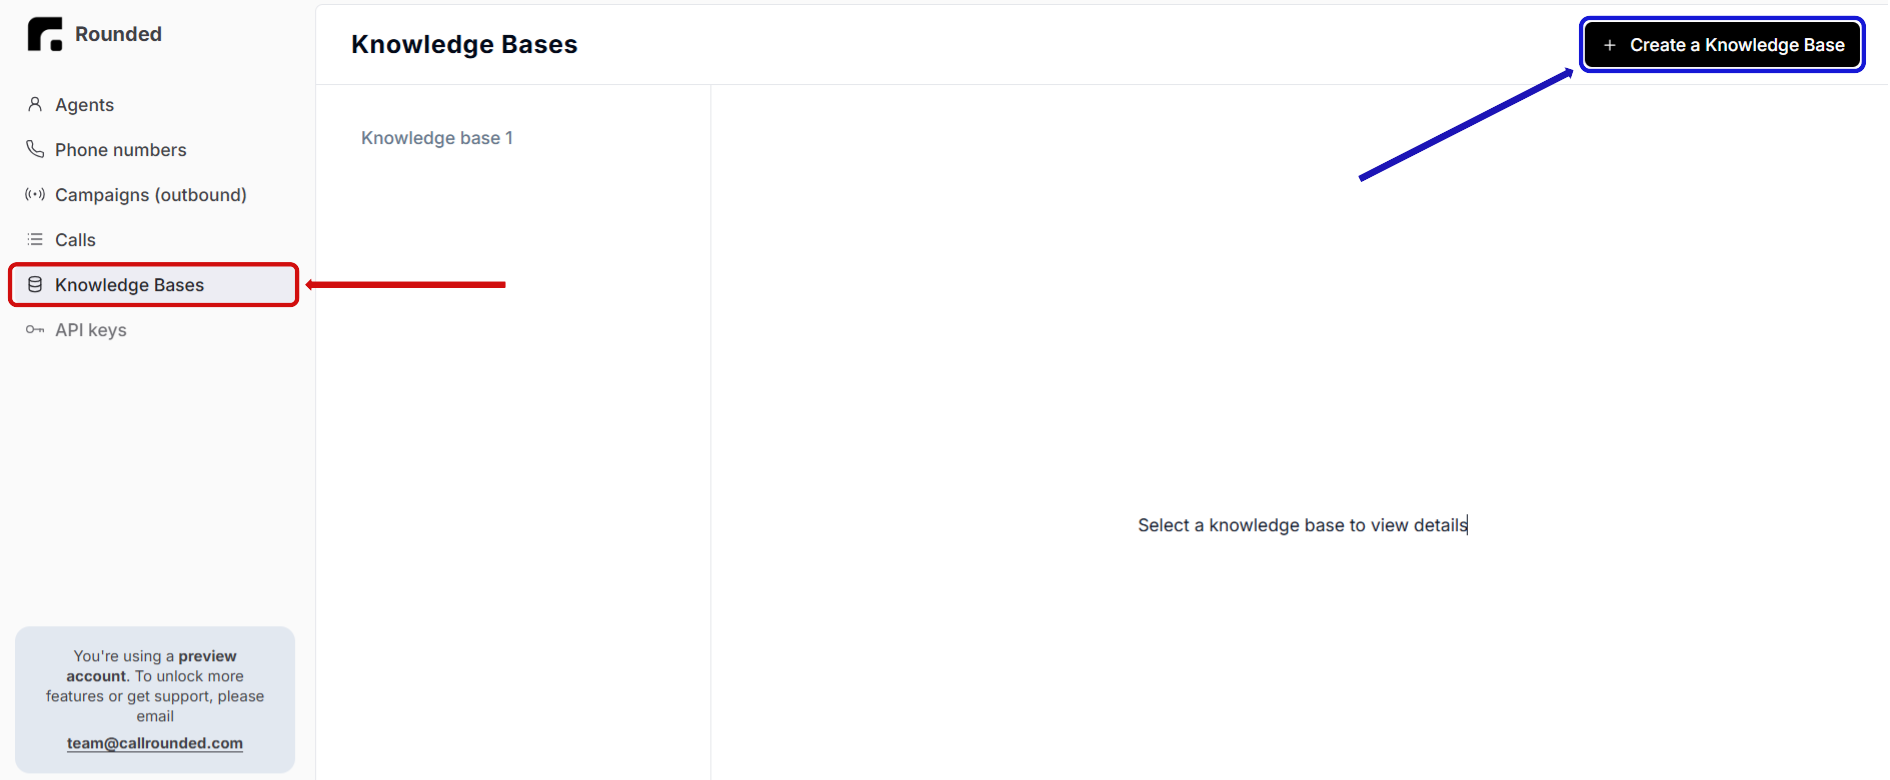
3. Add Documents to the Knowledge Base
- Once the new Knowledge Base is created, click on the “Add” button (highlighted in red on the screen below) within its section.
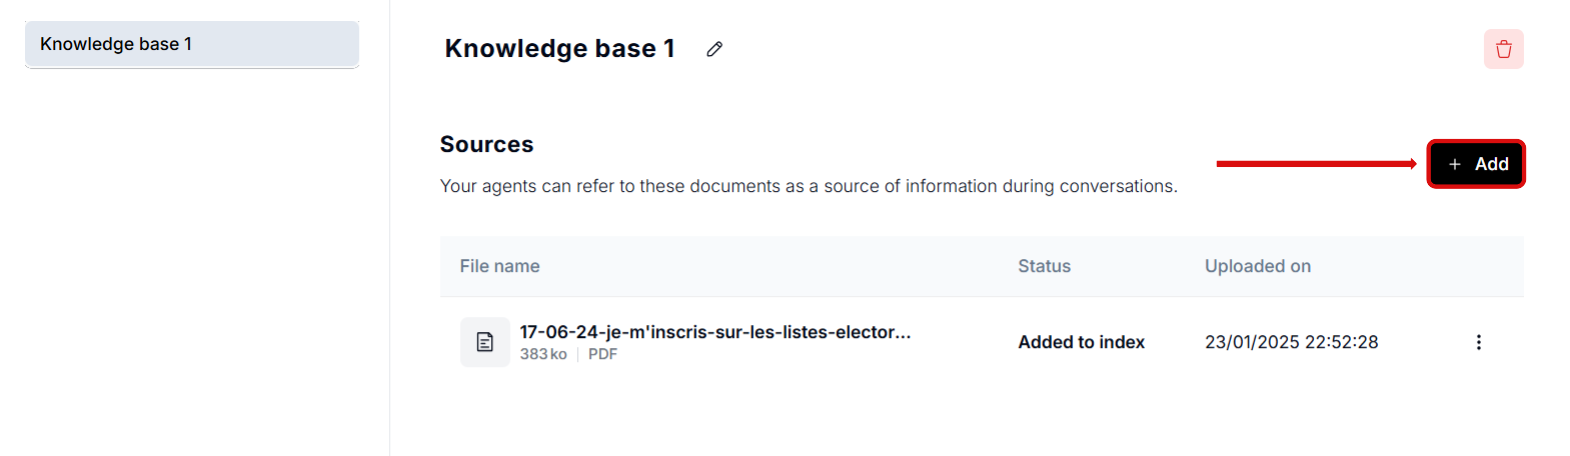
- Upload the desired file by clicking on the area highlighted in blue on the screenshot. Accepted formats include PDF and TXT.

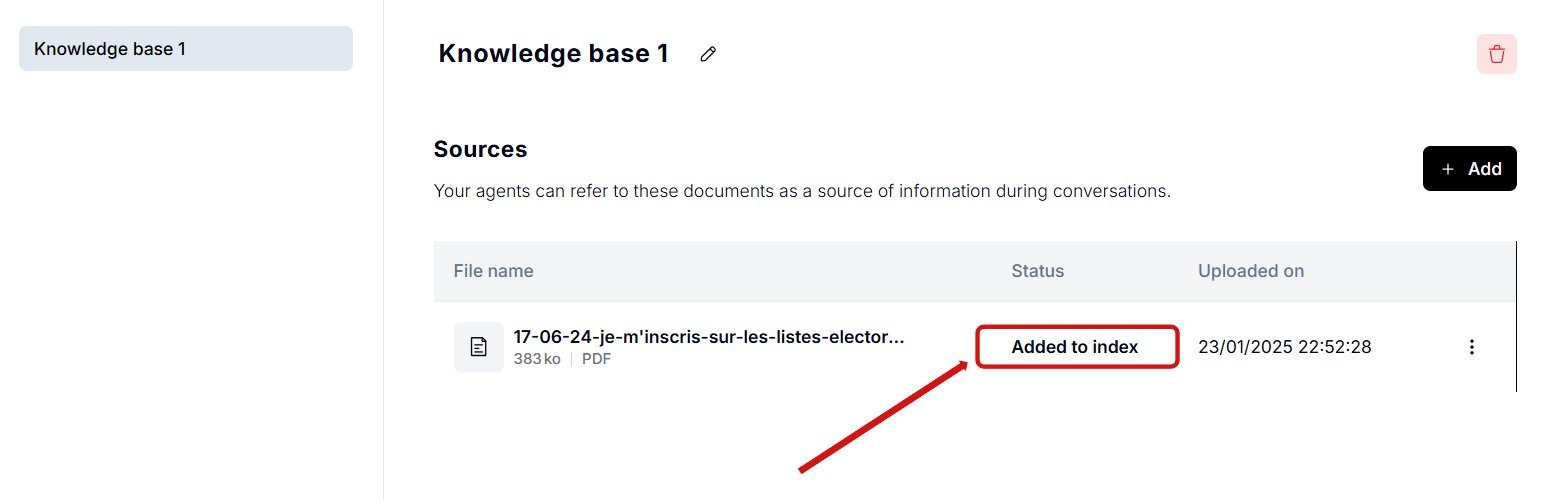
- After uploading the documents, wait for the status to change to “added to index” (as shown in red on the screenshot). This confirms that the document is successfully added to the Knowledge Base and is ready for use.
4. Using a Knowledge Base in Tasks
To enable your agent to consult the Knowledge Base, you need to configure it in the Tasks section.Step 1: Go to the Task Settings
Open the task where the agent may need to access the Knowledge Base.Step 2: Link the Knowledge Base
Click on “Add a knowledge base” (highlighted in red on the screenshot below) and select the Knowledge Base you wish to associate.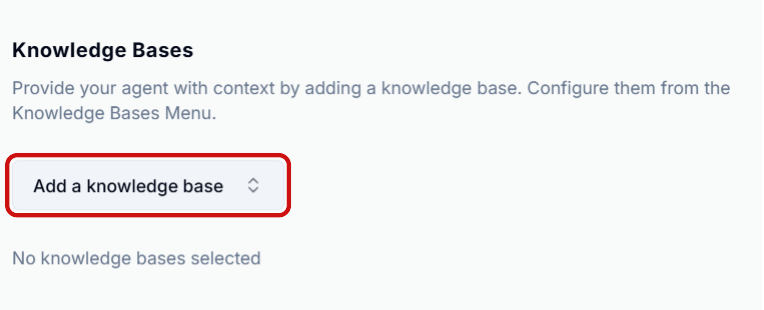
Define Usage Conditions in the Prompt
Specify in the prompt when the agent should consult the Knowledge Base.For example:
“If you’re unsure about the procedure for handling a lost card, consult the ‘Q&A’ Knowledge Base.”