Build your first agent in a few minutes on Rounded
Let’s walk through the essential steps to create, test, and deploy your first AI voice agent using Rounded.1. Create your account
Go to the login terminal to create your Rounded account. You can sign up with your email or Google account.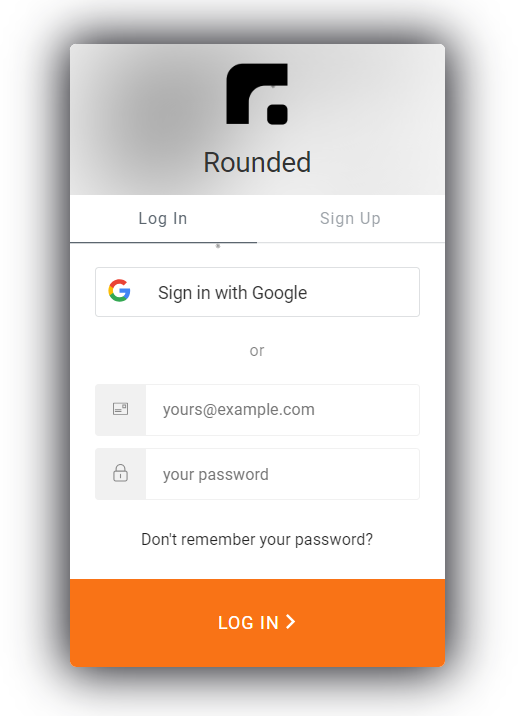
2. Choose how to start
Once inside the platform, you can either:- Start with an existing template (recommended for first-time users)
- Start from scratch
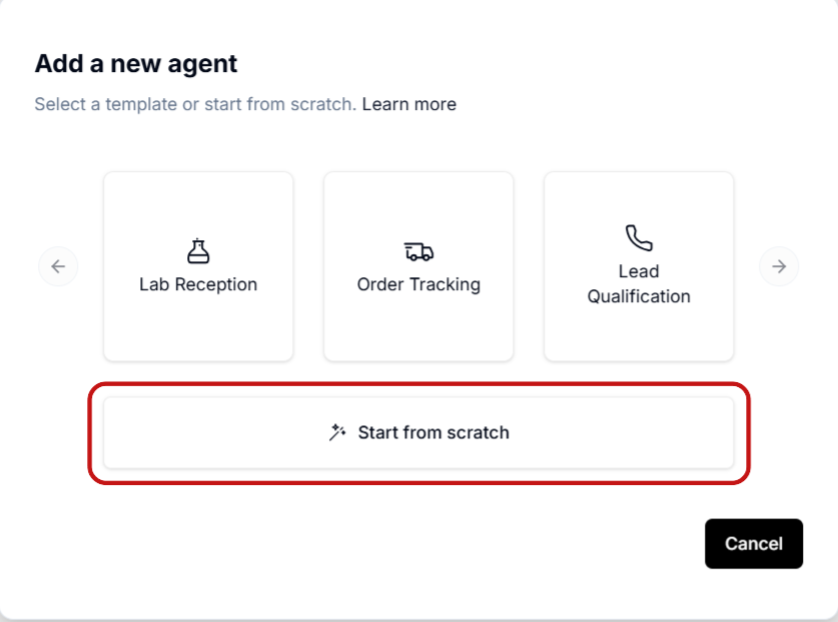
3. Select a template
Choose the Lab Reception template as a starting point.Even if you’re not building a lab receptionist, it’s a good base to explore and customize.
4. Adapt the flow
Modify the flow to match your use case. You can edit the procedures, tasks, and wording to fit your needs.5. Test your agent
To test how your agent behaves:- Click the chat bubble in the top-right corner of the screen
- Then click the Start test button
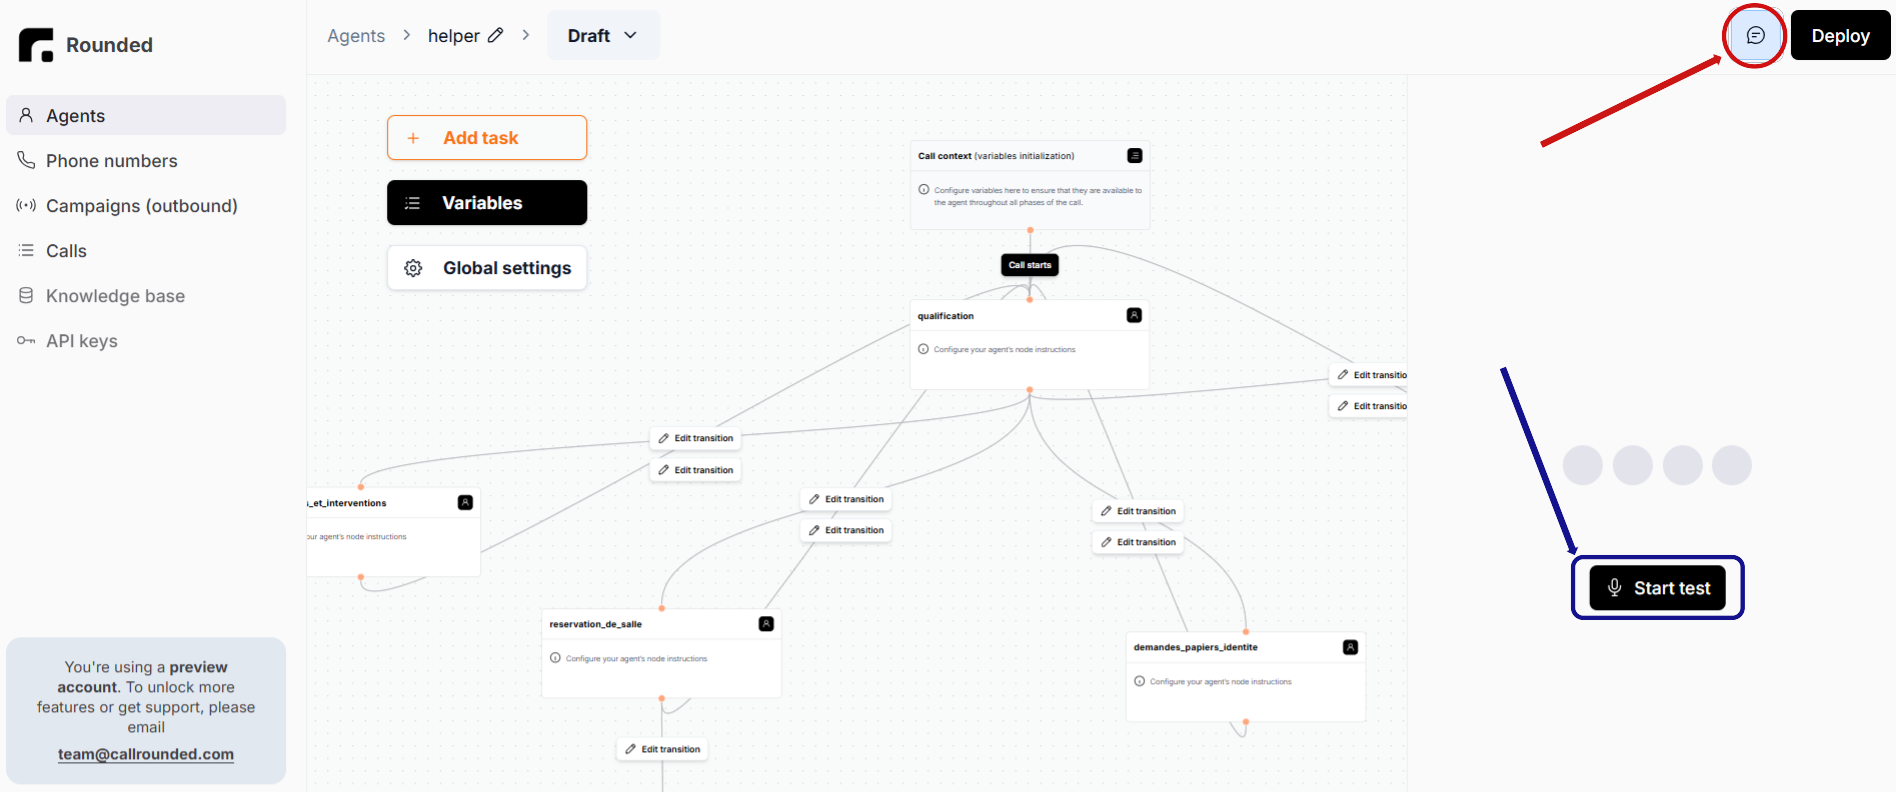
6. Deploy your agent
Once you’re happy with the behavior, deploy your agent to make it live.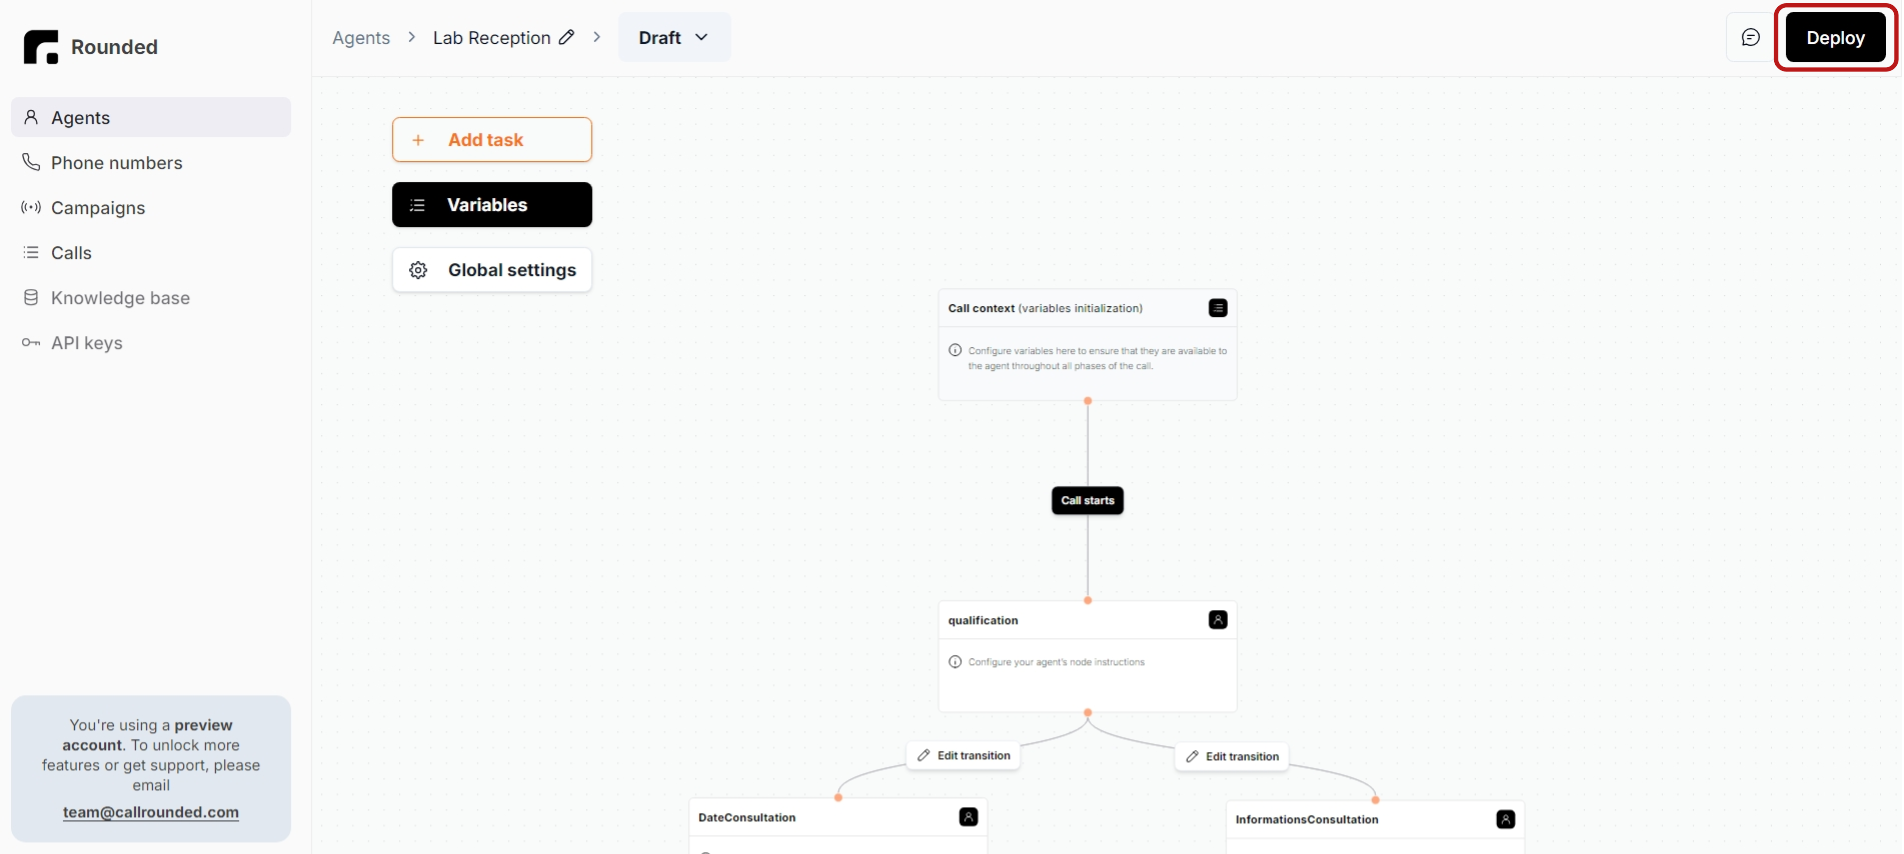
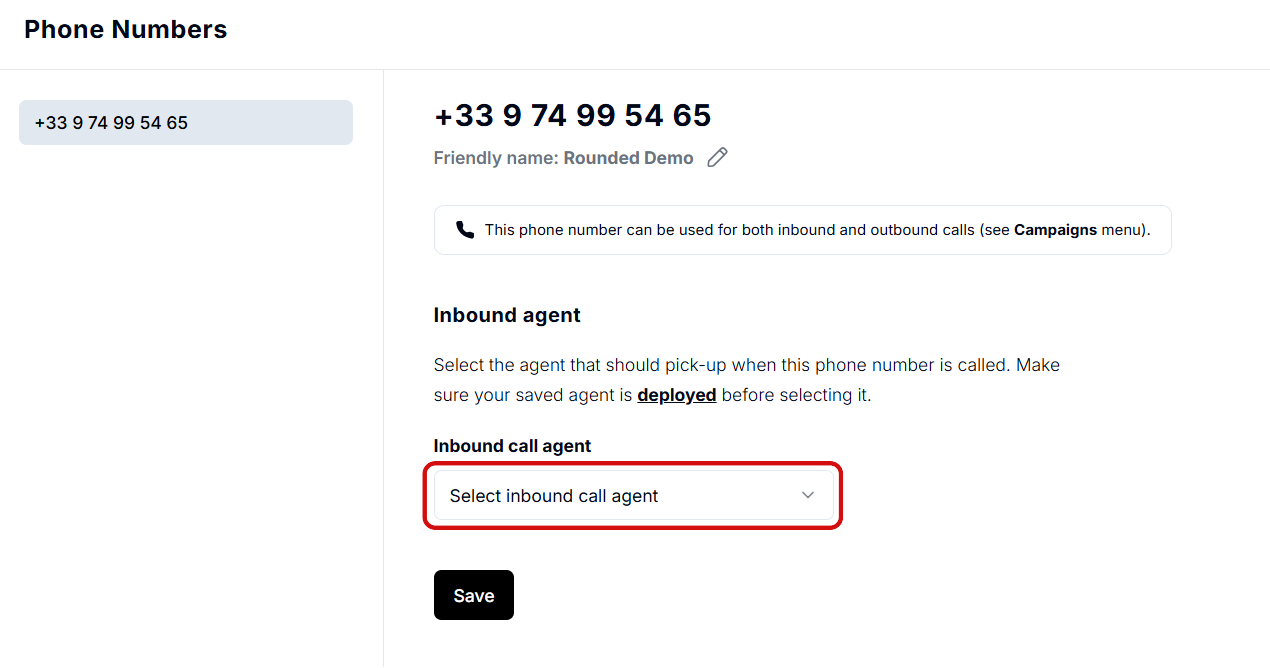
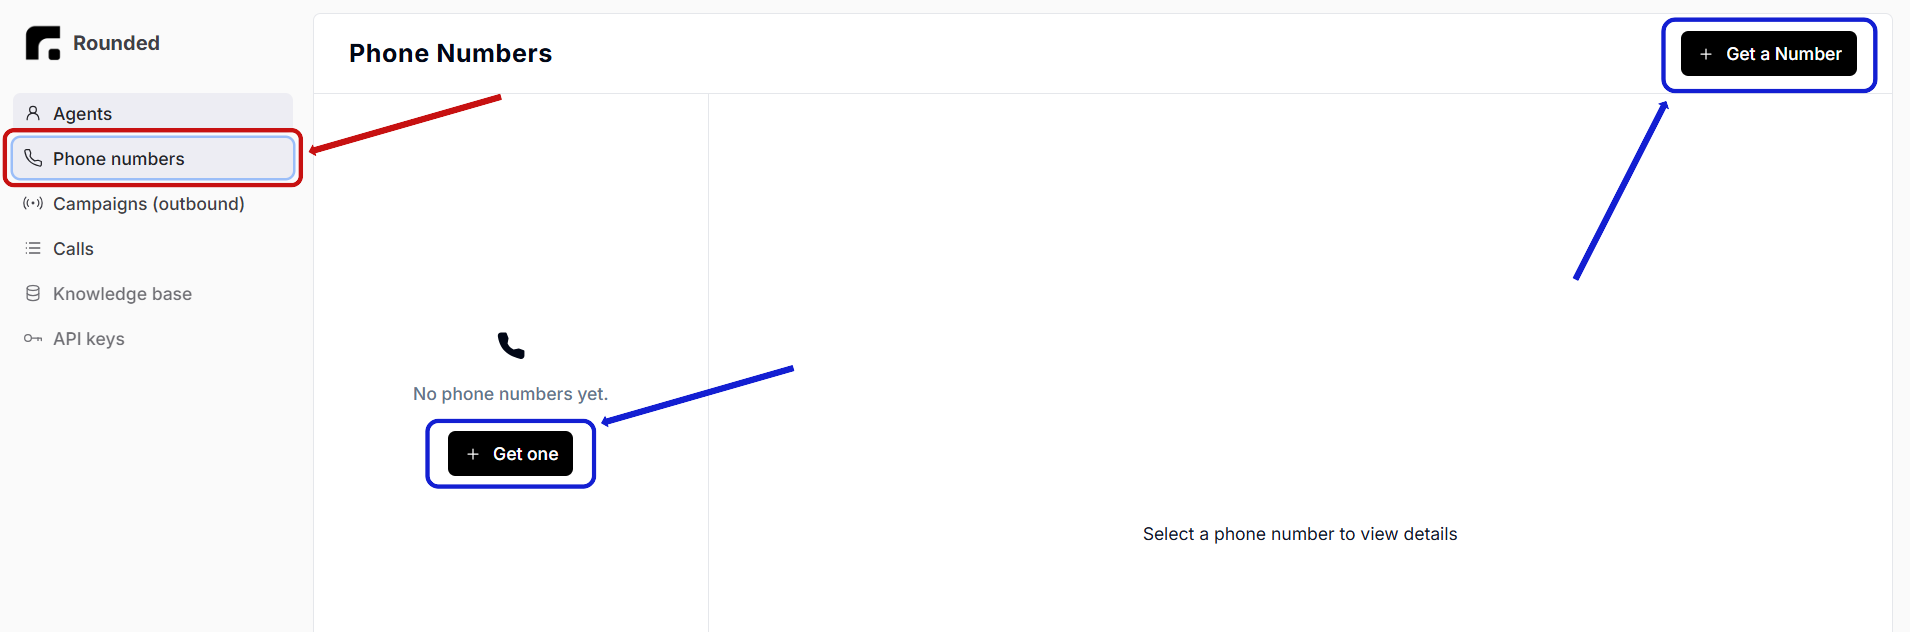
7. Assign a phone number
To make your agent reachable by phone:- Go to the Phone Numbers tab
- Click Add Phone Number
 Then:
Then:
- Select your agent under Inbound Call Agent
- Click Save